summary
Install Linux OS on the virtual platform.
purpose
- Install virtual environment
- Install virtual OS
- Staticize local address
2.Install virtual OS
After successfully installing the virtual environment, let’s install the virtual OS next.
The virtual OS to be installed is Linux.
There are three main types of free Linux distributions.
| system | OS | unique |
| RedHat | CentOS Rocky CentOS Stream | Compatible with Red Hat Enterprise Linux (commonly known as RHEL) developed by Red Hat. “Rocky” is a project launched due to the suspension of CentOS development. |
| Debian | Debian Ubuntu | “Debian” is being developed by volunteers around the world. “Ubuntu” is developed based on “Debian GNU / Linux” and has a UI close to “Windows”. |
| Slackware | Slackware | A Linux distribution with a long history. Difficult for beginners due to its simple design |
A distribution is a combination of “kernel” and software.
Each has its own characteristics, but this time I would like to use “Rocky”.
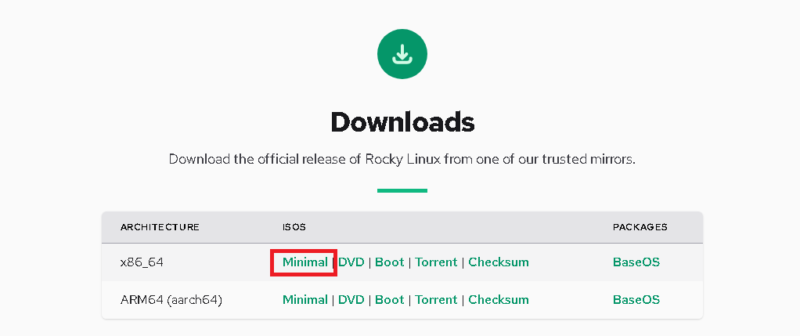
- Rocky linux download
Download the image file for installation from “Rocky linux download”.
- Rocky installation
Launch VirtualBox and click “New”
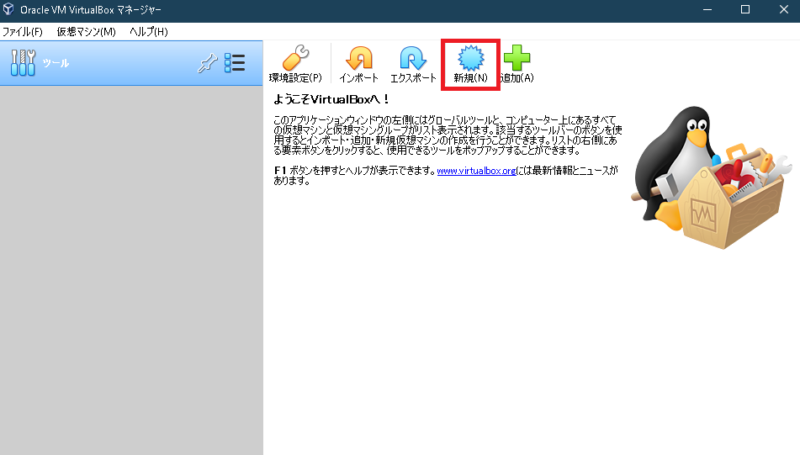
“Name” and “Machine Folder” are arbitrary.
Select “Linux” for “Type” and “Red Hat (64-bit)” for “Version”.
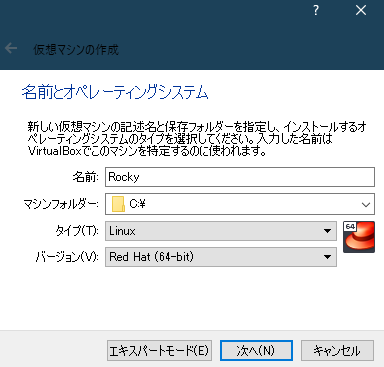
“Memory size” may be appropriate. You can change it later.
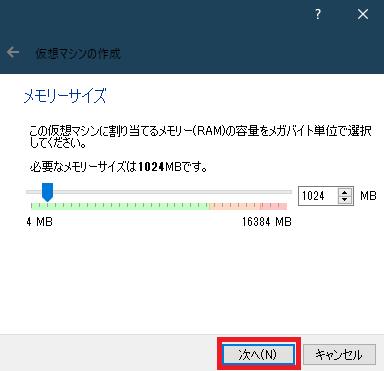
Create a “virtual disk”.
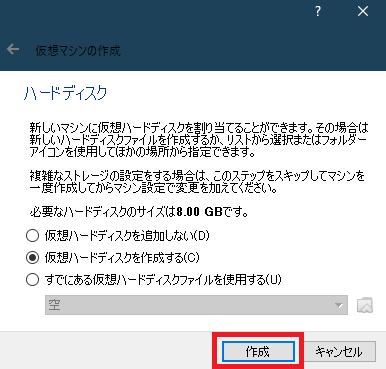
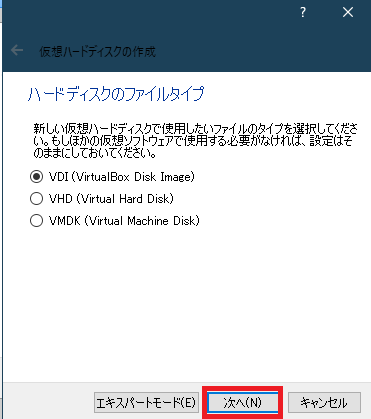
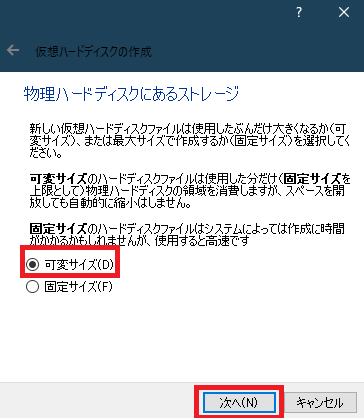
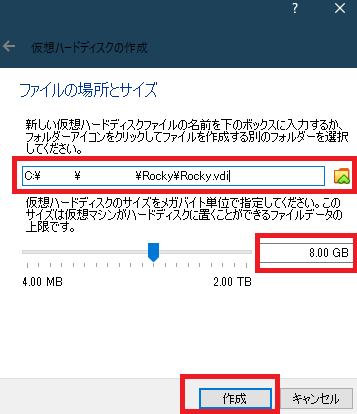
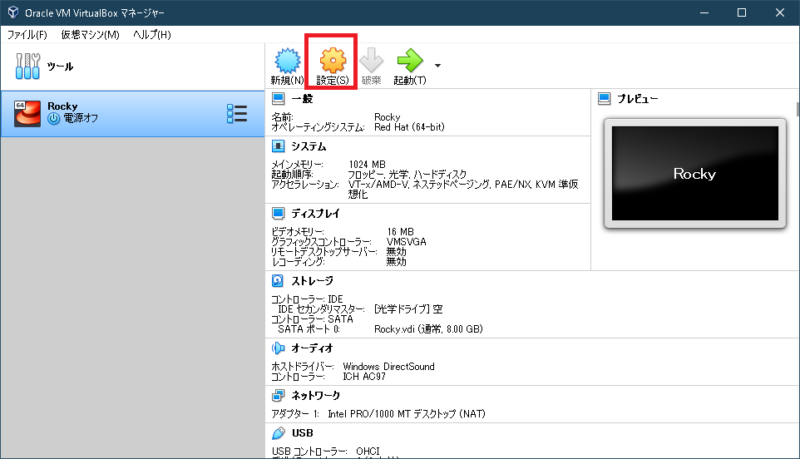
Click “Settings” when the screen below appears
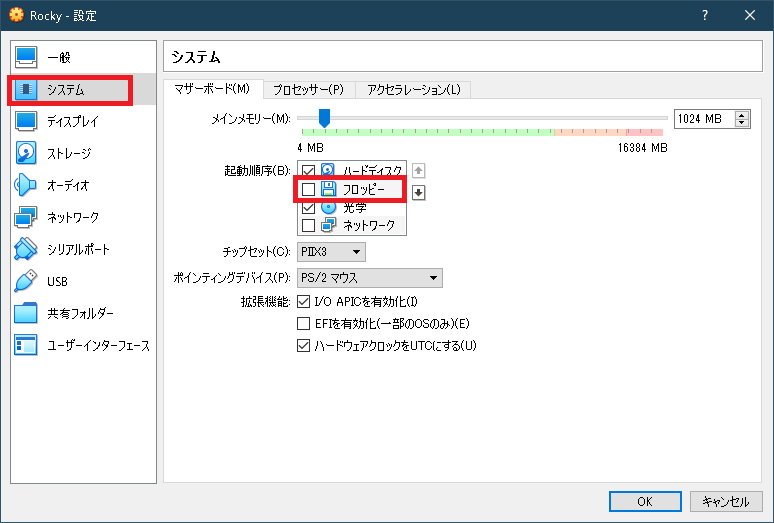
Uncheck “Floppy” in “System”
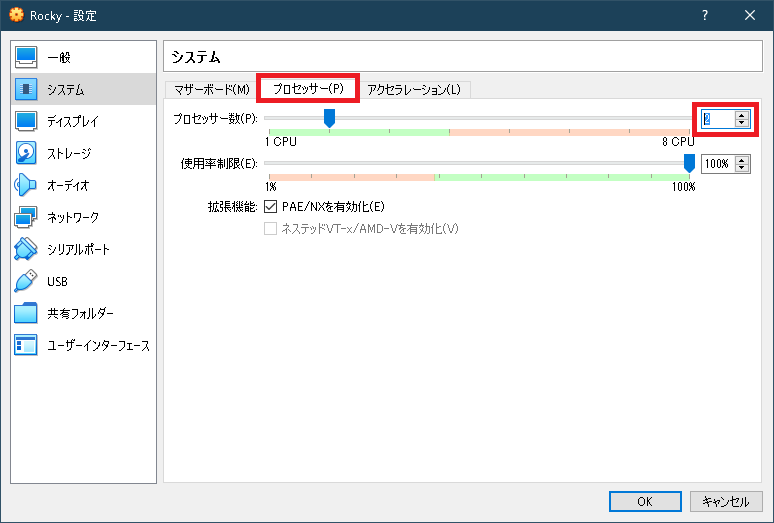
Click the “Processors” tab and set “Number of Processors” to “2”
Click “Storage> Empty> Mark Disk> Select Disk File”
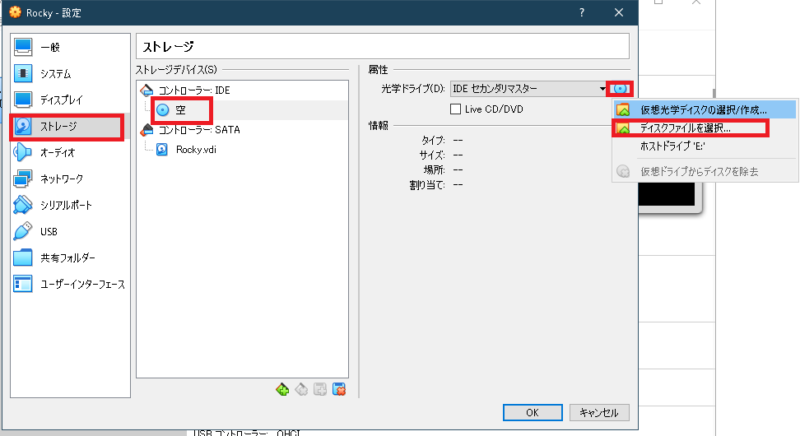
Select the downloaded Rocky image

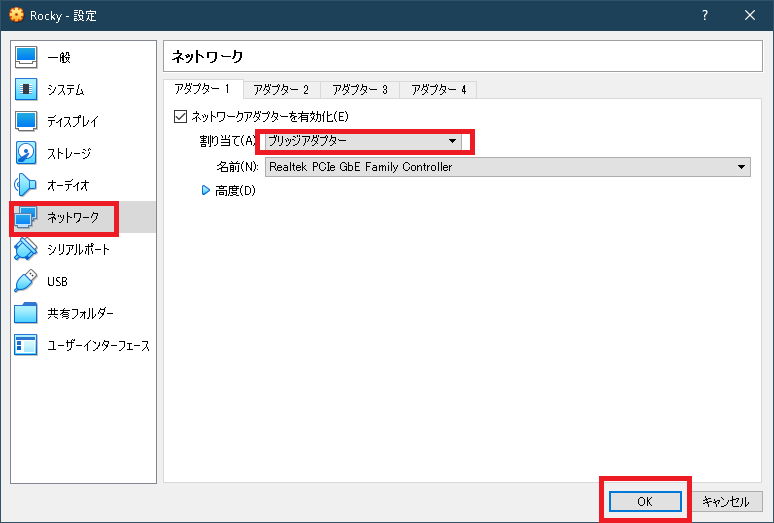
Change the “Network” assignment to “Bridge Adapter” and click “OK”
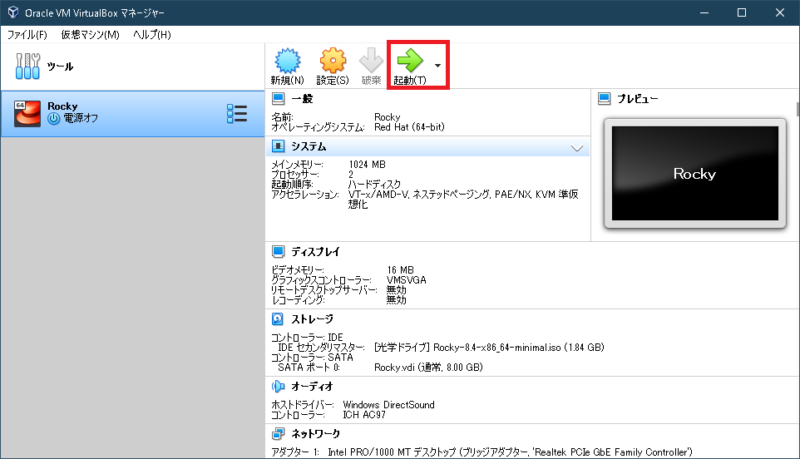
Click “Launch”
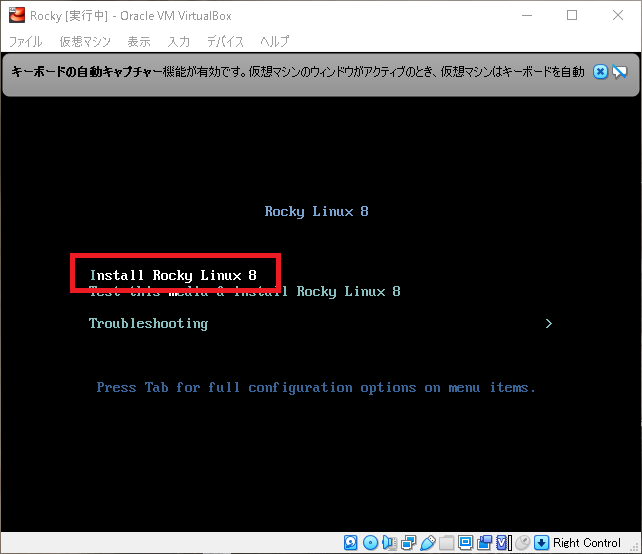
Select “Install Rocky Linux 8” (press the up and down keys so that it is white and enter)
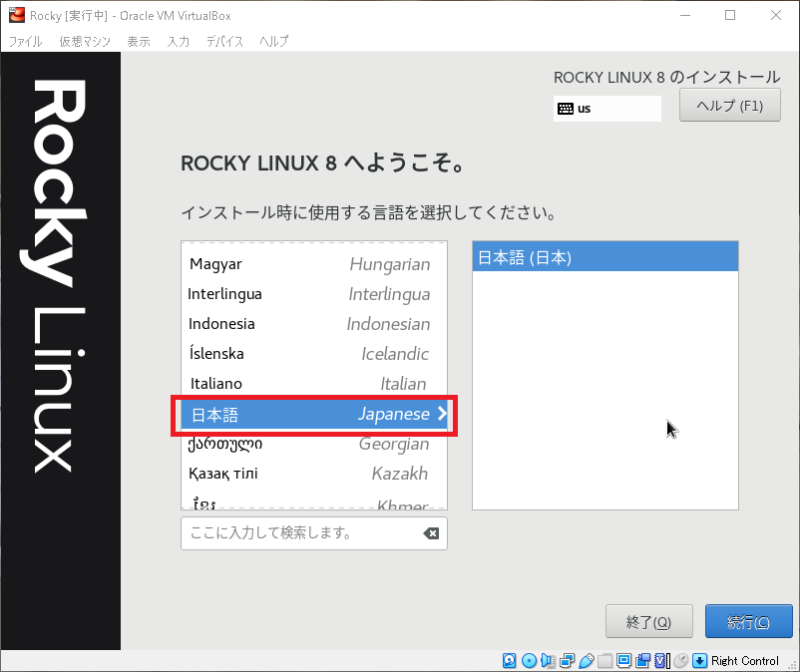
After installation, select the language
(press the “Ctrl” key on the right side of the keyboard to exit)
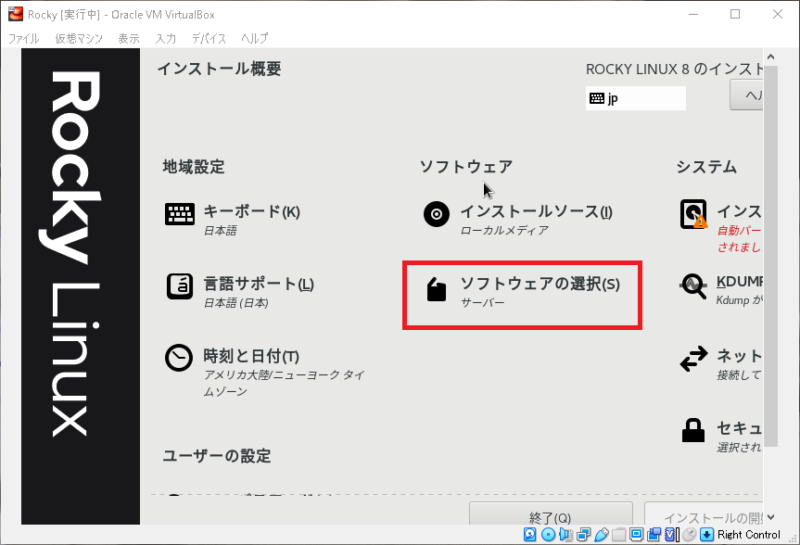
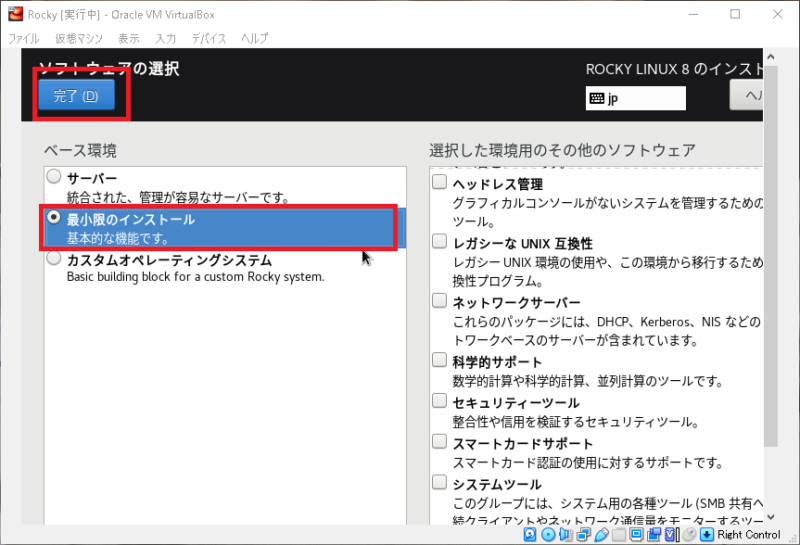
Click “Select Software” and select Minimal Installation.
Change “time and date” and “root password”
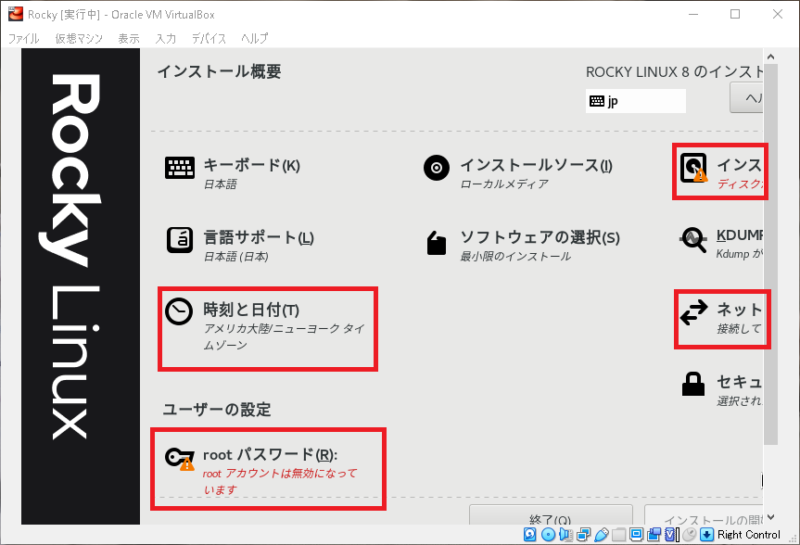
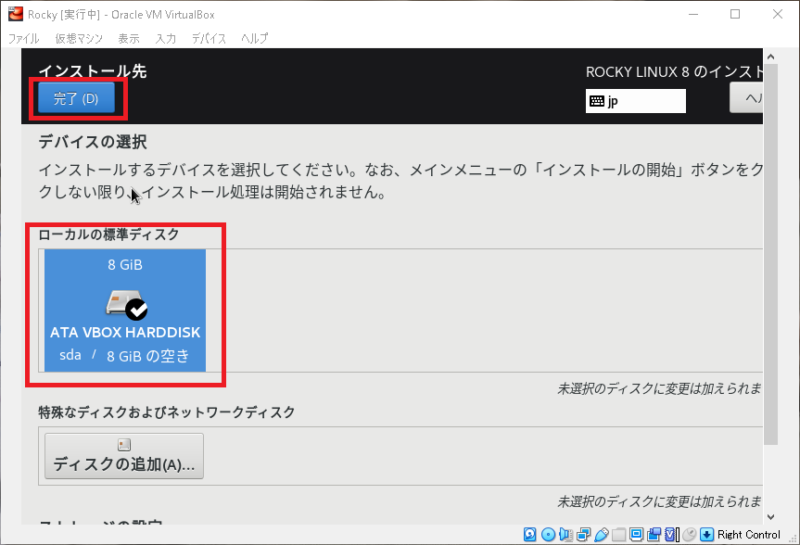
Click “Install to” and check if the local standard disk is checked.
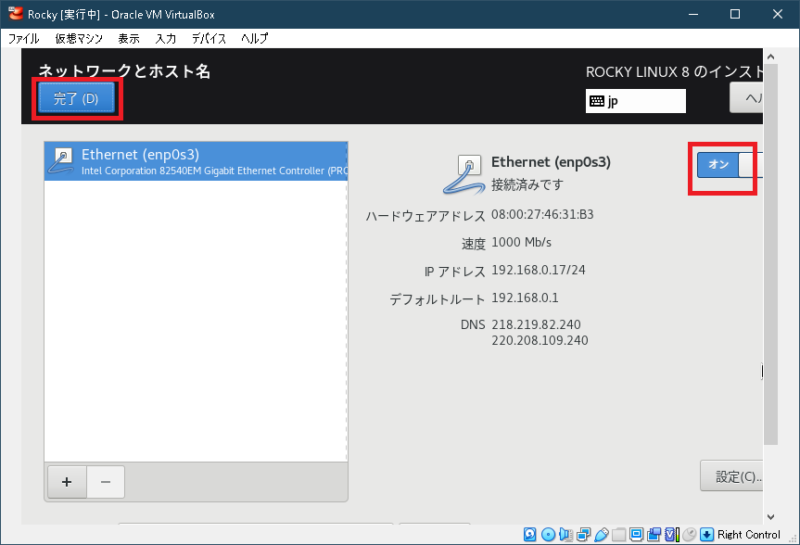
Select “Network and Hostname” to turn it on
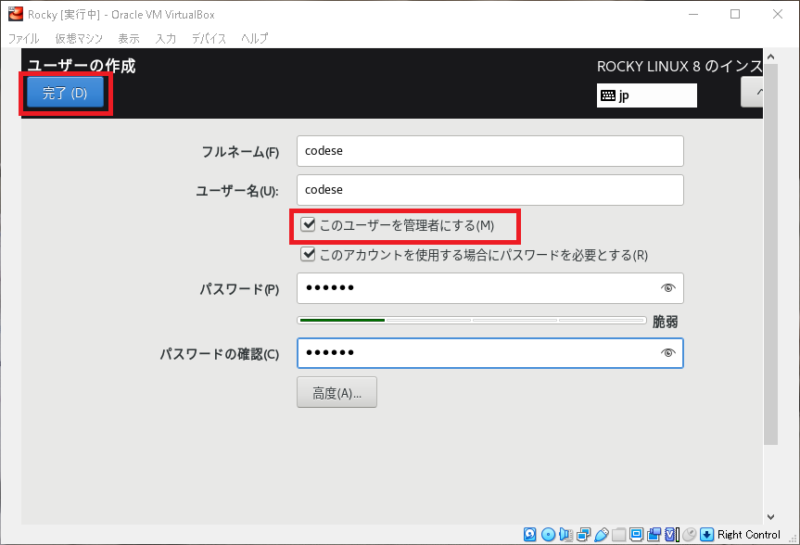
Check “Make this user an administrator” in “Create user”.
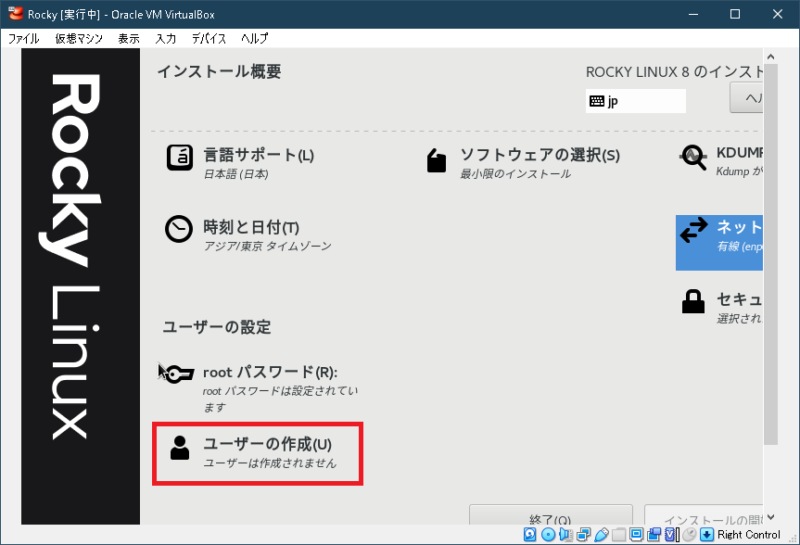
Click “Start Installation” (if it doesn’t look right, move the bar to the right down)
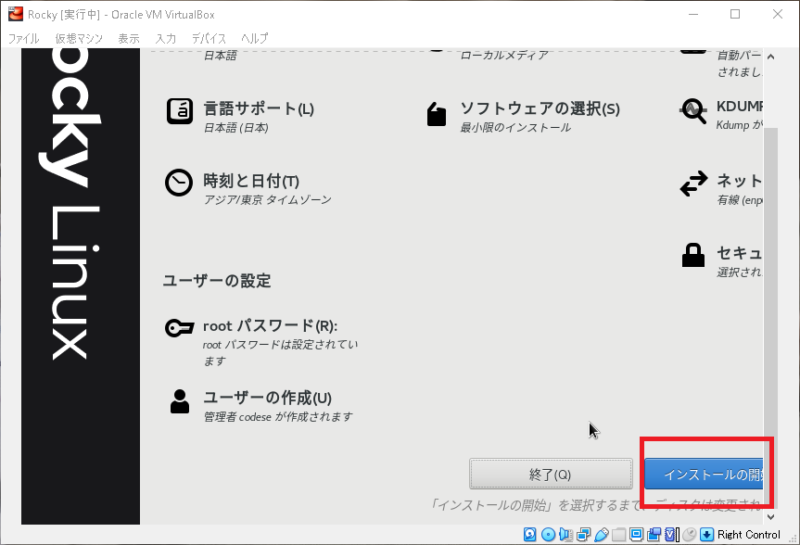
Installation will start
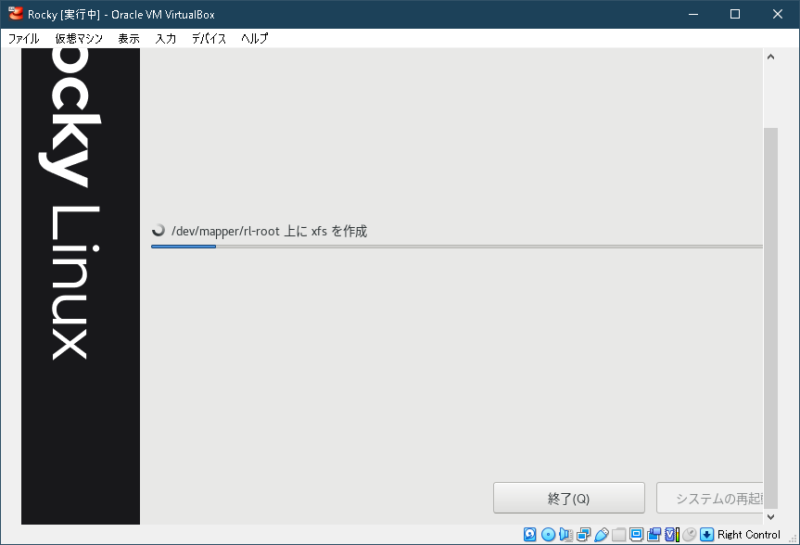
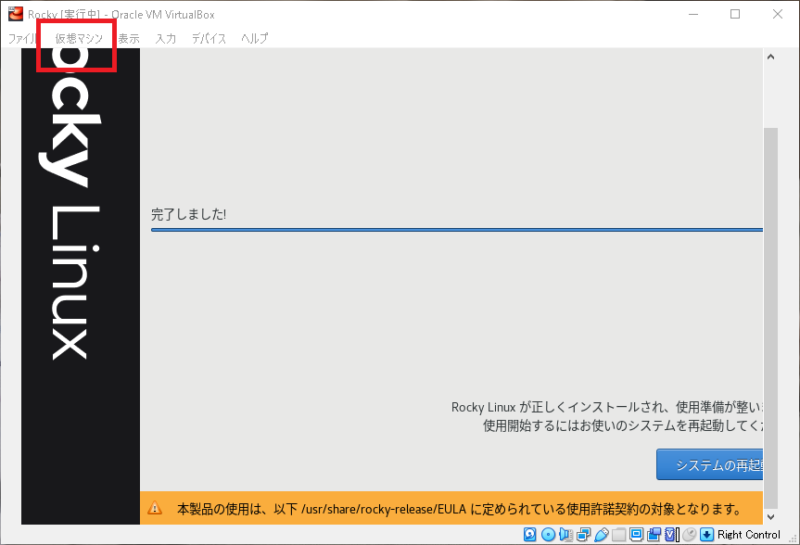
Click “Virtual Machine> Settings” after installation.
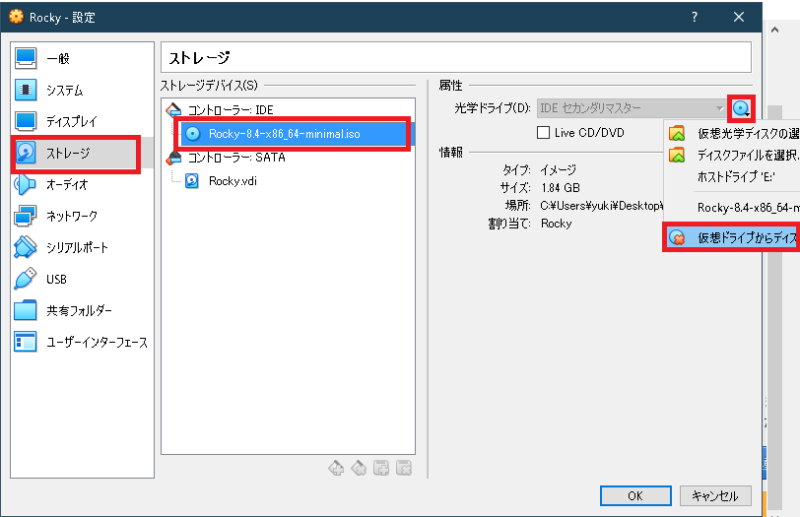
Select “Storage> Rocky-8.4-x86_64-minimal.iso> Remove Disk from Virtual Drive”
“Rocky-8.4-x86_64-minimal.iso” becomes “empty”.
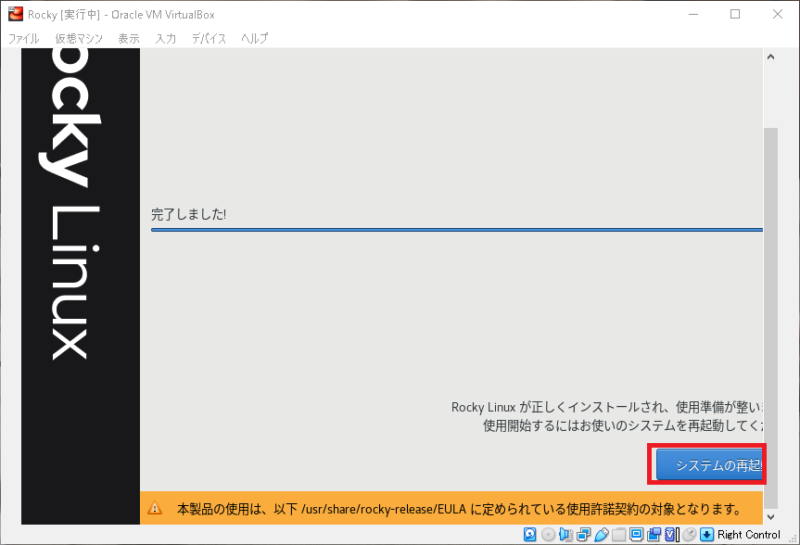
Click “Restart System”
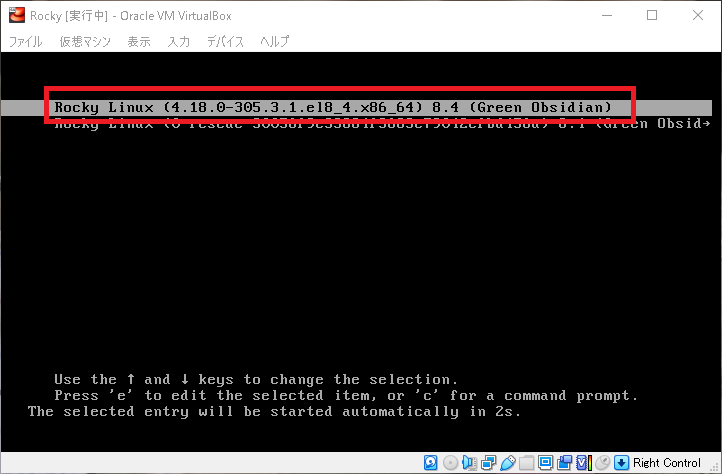
Select “Rocky Linux” after reboot
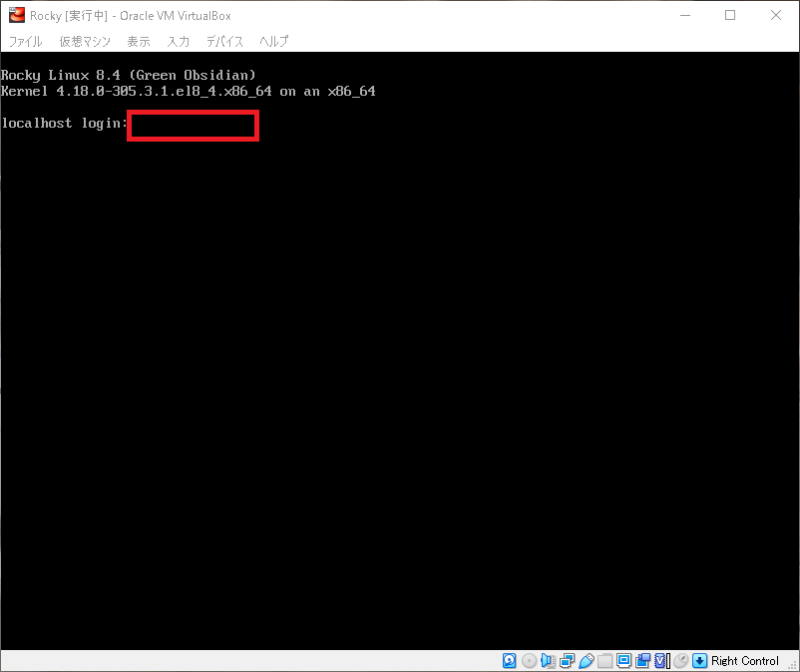
You can log in with the user and password you created earlier.
The end command is as follows.
shutdown -h nowEnd
Next time, let’s staticize the local address.
good job today.
